How to configure Google Cloud Storage
1. Sign Up or Log In to Google Cloud Platform
If you don't already have a Google Cloud account, you'll need to sign up at Google Cloud Platform.
If you have an account, simply log in.
2. Creating a Project
Create a new project in the Google Cloud Console. If you have an existing project, select it instead.
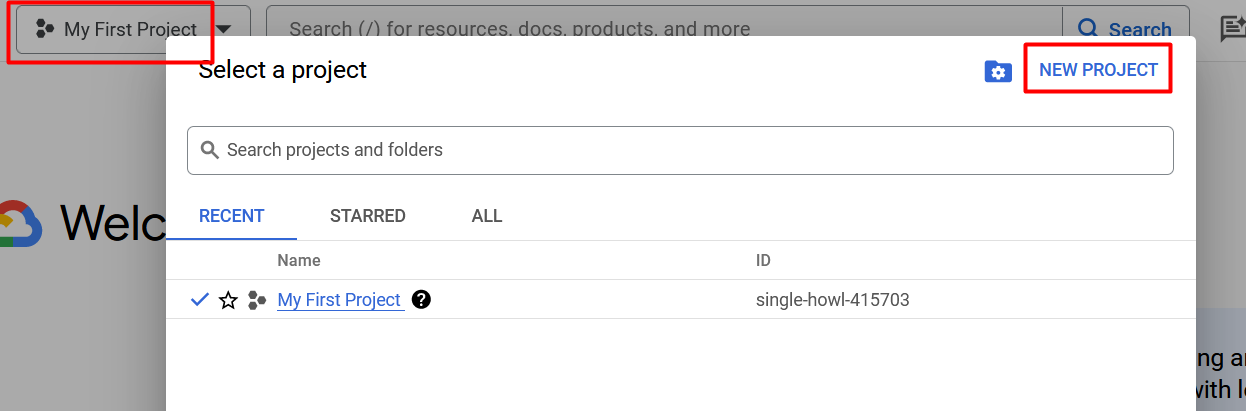
Type a name for your project and click 'Create'. After creation, choose your newly created project from the project selector at the top.
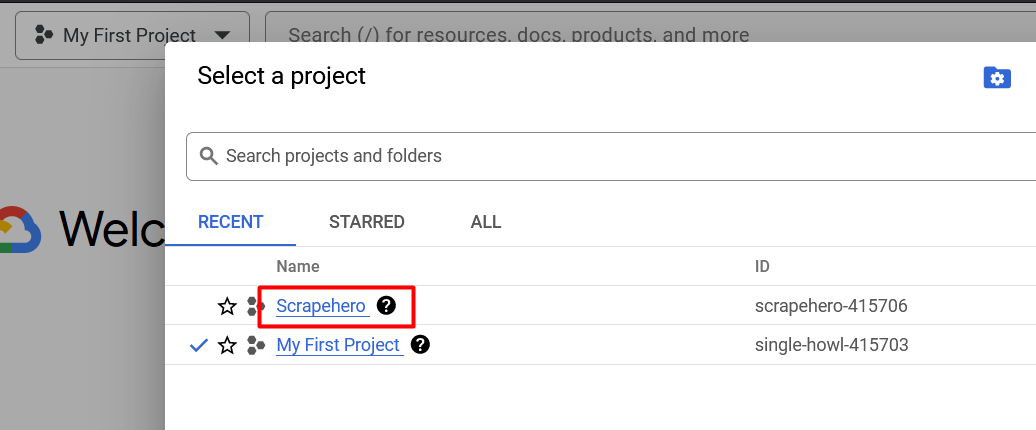
3. Enable the Google Cloud Storage API
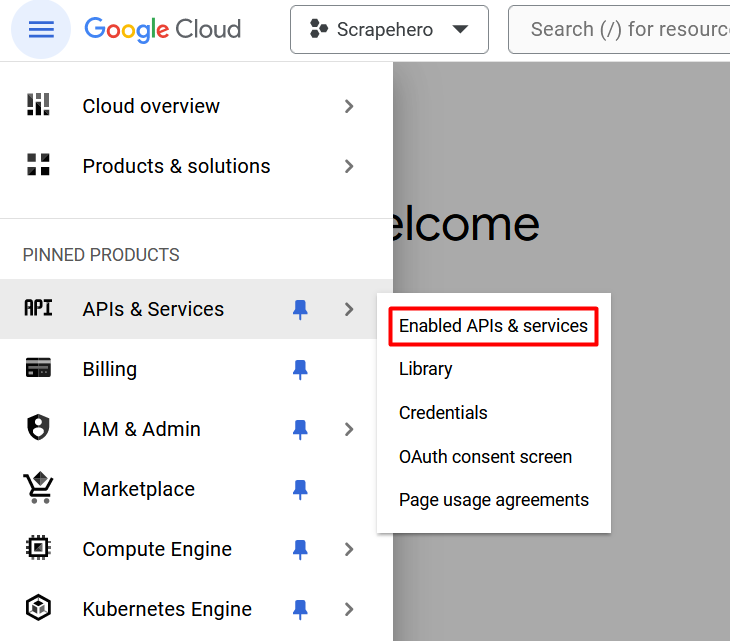
Goto ‘API & Services’ and select ‘Enabled API and Services’
Click on ‘Enable API and Services’
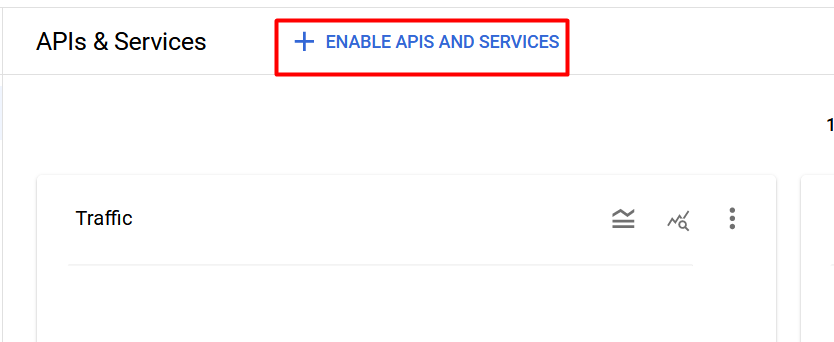
Search for "Google Cloud Storage" and enable the API
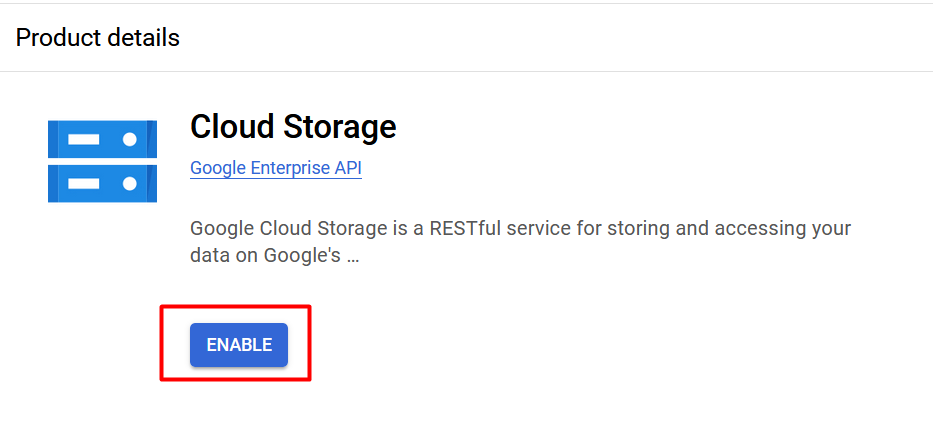
4. Create a Service Account
Navigate to "IAM & Admin > Service Accounts".
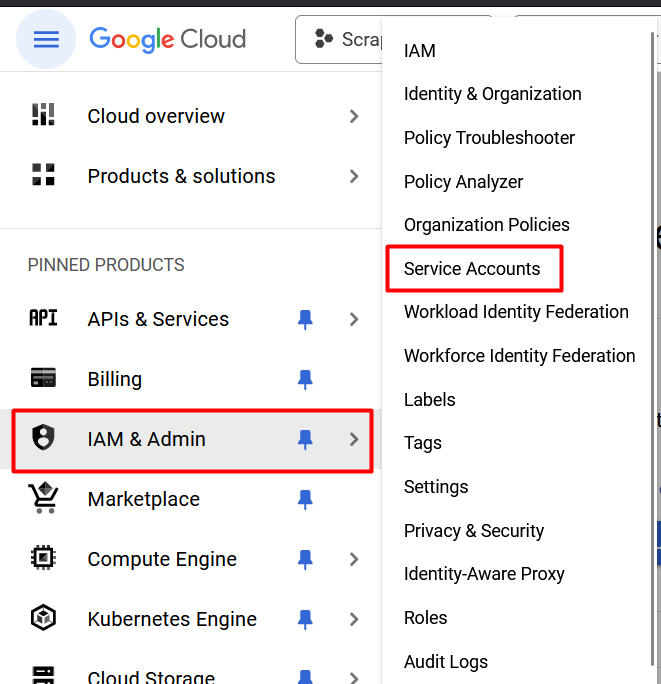
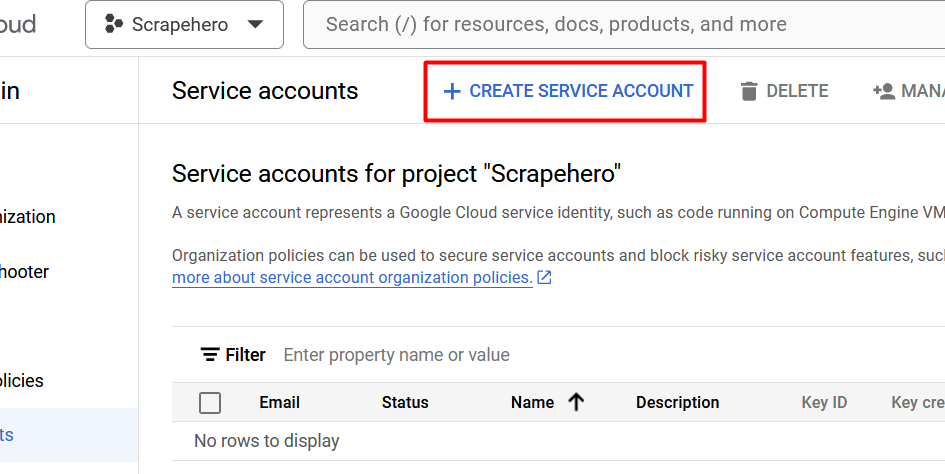
Click "Create Service Account".
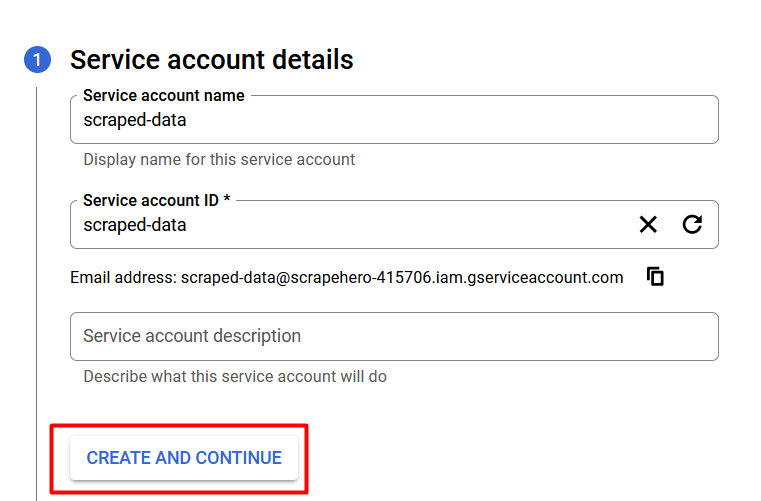
Enter a service account name and click "Create and continue".
On the “Grant this service account access to project” set role as Editor and click continue
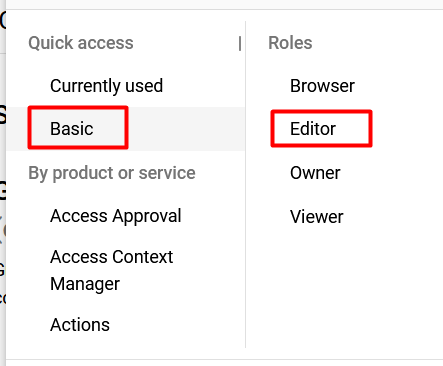
Click ‘Done’
Service account has been created.
5: Generate a Key File
Find the service account you created and click on it.
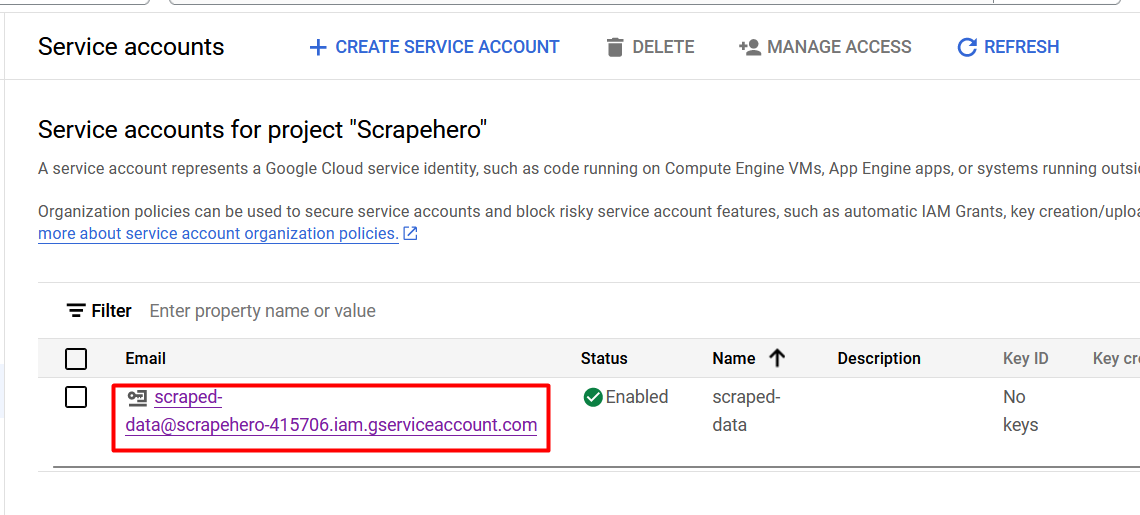
Go to the "Keys" tab and click "Add Key"
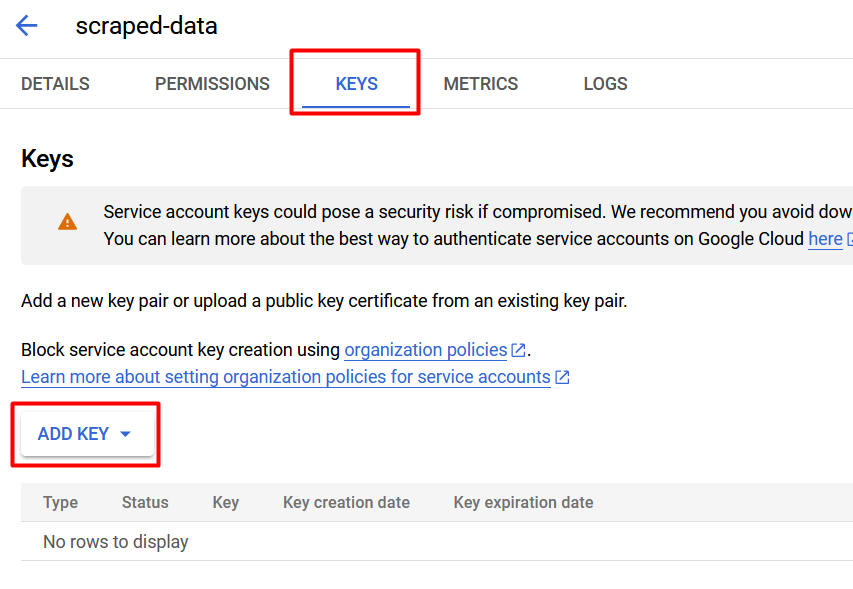
Choose ‘New Key’ and select ‘Json’

A JSON file containing all the necessary details for data upload will be generated and downloaded to your system. Please share this JSON file with us.
6. Creating a Bucket
Goto ‘Cloud Storage' and Select bucket
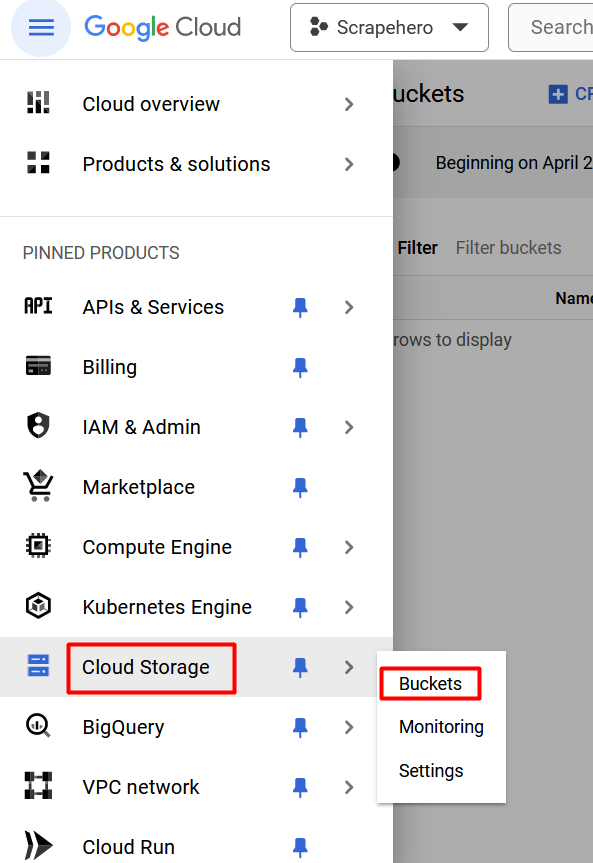
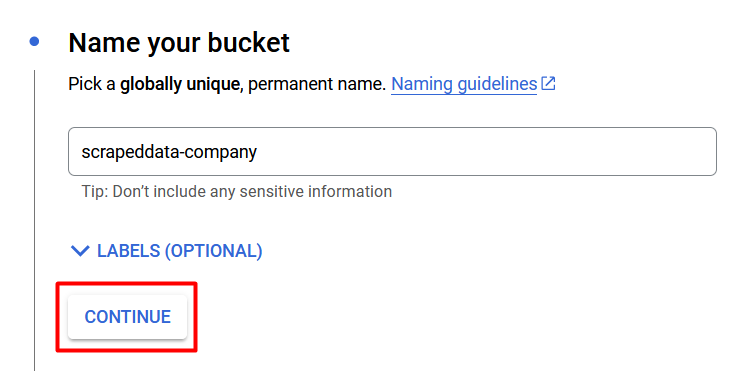
Click on ‘Create’ and enter an globally unique bucket name and click ‘continue’
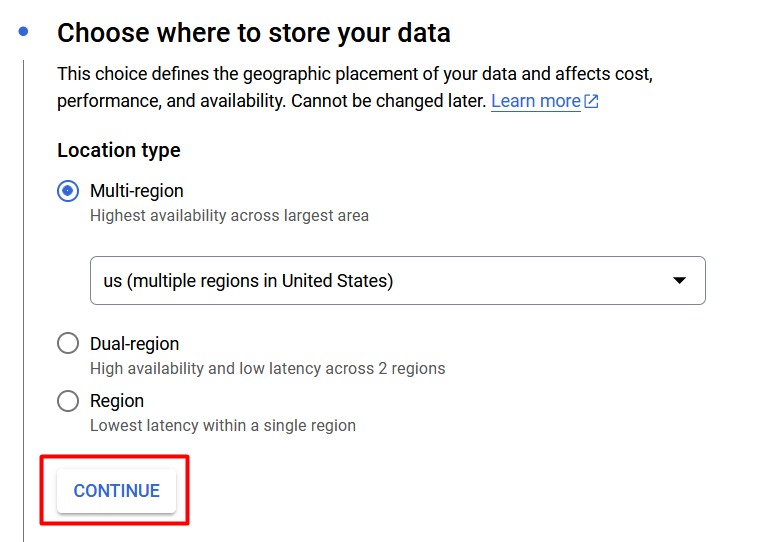
Choose where to store your data, click ‘continue’
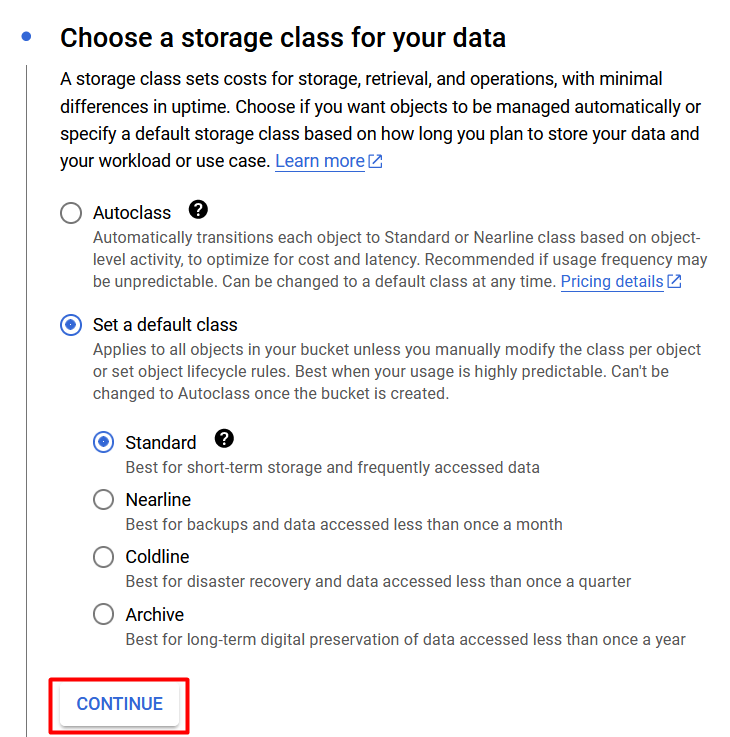
Choose a storage class for your data and click ‘continue’
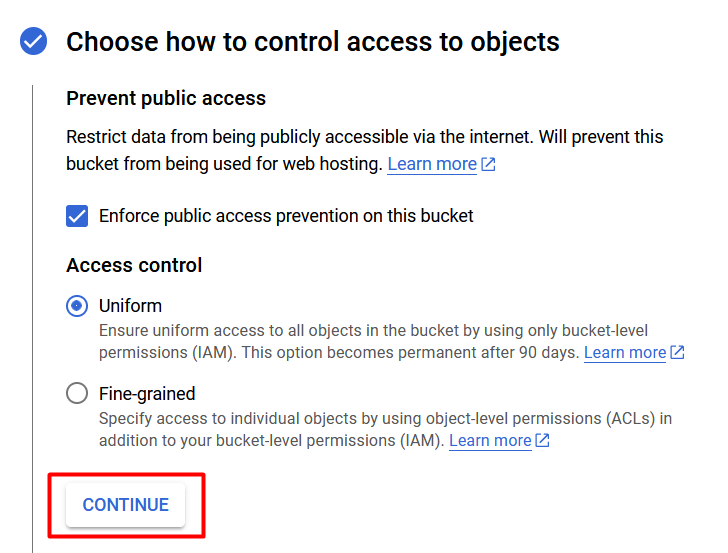
Choose how to control access to objects and click ‘continue’
Choose Data protection or retentions if required and click ‘Create’
The bucket has been successfully created.
Please provide the bucket name with the JSON file. ScrapeHero will use this bucket to upload all the scraped data.